Intro to Github Pages: Create a simple and free personal website
The world of web development can be insanely complex and overwhelming, however building a simple website doesn’t have to be difficult. Many people’s needs can be fulfilled simply by taking 30 minutes to set up a website on Github pages completely for free.
Power of Github Pages
Although the original purpose of Github Pages is to showcase a programmer’s work on Github, it can also be used for many other purposes.
- Hosting a blog
- a portfolio
- a business landing page
- an open letter
All these, and more, are possible through Github Pages, which has a soft-cap of 100 GB of bandwidth per month. On my blog, the average user uses about 612.43 KB of bandwidth per month, which means if my blog were hosted on Github Pages this soft-cap won’t be met until I have 163,284 monthly users. (This blog is hosted on Netlify, which will be another tutorial).
With Github Pages you have the option of
- simply write your content using Markdown files and use one of Github’s default themes, with the option of customization
- use a static site generator along with Github Actions, which has more customization and many templates to get you started
- or write HTML, CSS, and Javascript directly in Github
With this blog, I used a static site generator called “Hexo” which can also be used with Github Pages. However for this tutorial I will be showing you how to simply using one of Github’s provided themes:
- jekyll-theme-primer
- minima
- architect
- cayman
- jekyll-theme-dinky
- jekyll-theme-hacker
- jekyll-theme-leap-day
- jekyll-theme-merlot
- jekyll-theme-midnight
- jekyll-theme-minimal
- jekyll-theme-modernist
- jekyll-theme-slate
- jekyll-theme-tactile
- jekyll-theme-time-machine
Clicking through the links above, you might notice that many of the themes are designed to showcase a coding project, however with a bit of configuration, we can easily change them to fit many needs. Also, the first two themes, primer and minima, are a bit different from the other themes. Primer is the most simple theme and is basically just a single page, whereas Minima is a starter theme for building a blog. These two themes being a blank slate are a good place to start with if you want to build a website from the ground up.
Choosing a theme
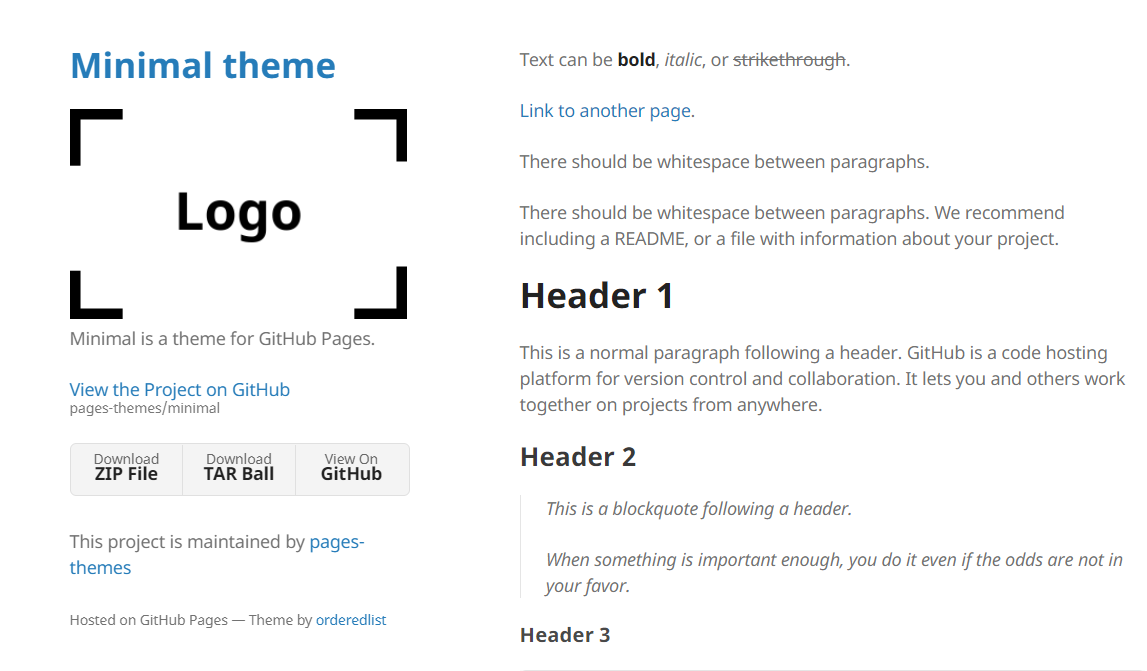
The theme I will use for this tutorial is minimal because its two-column format is perfect for a personal portfolio website.
The [Logo] is a good spot for a picture of myself, and below that is space for links to my Github, my Linkedin, and my contact info. The column to the right is where I will list my skills, experience, projects, and resume.
Also, like all themes, this is totally customizable so I can add more things to the left column such as a graph showing which skills I’m best at.
Creating the website
Now let’s get started. First navigate to github.com and either log in or create an account if you don’t have one. Once you are logged in, click the “New” button to create a new repository:
Repository Name After this, you are brought to the “Create a new repository” page. If you wish your website to be hosted on the URL
Description Some themes for Github Pages use the description, so fill in this field with a subtitle for your website. You can change this later.
Public / Private Select “Public” so that way you can host your website for free on Github Pages. This also means anyone can see the source code for your website, but this shouldn’t be too different from the content people can see on your website anyways.
The rest of the config on this page doesn’t matter too much, other than possibly choosing a license.
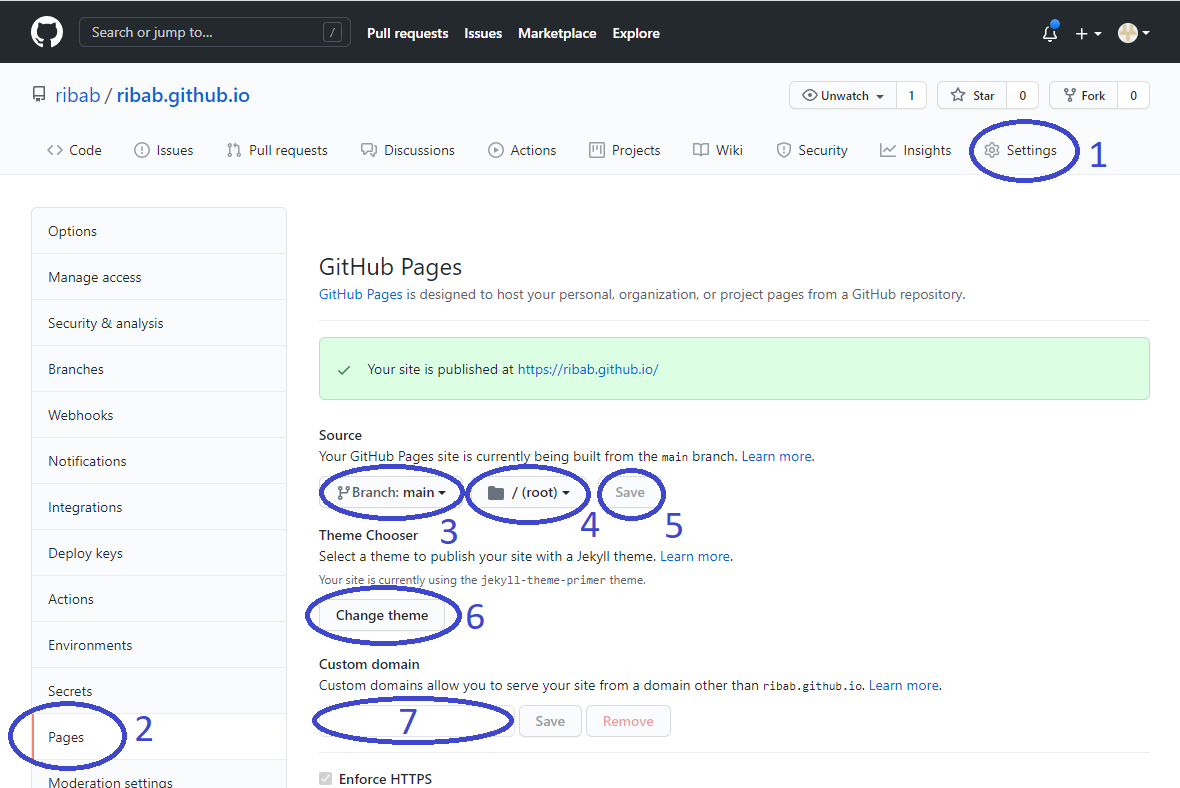
After clicking “Create repository” navigate to configure Github Pages with the instructions below:
- Click on “Settings”
- Click on “Pages”
- Select “main” branch
- Select
/directory - Click “Save”
- Choose theme (you can change this later)
- Optionally choose a custom domain to serve your website (you will need to buy and configure this domain from a website like domains.google. I won’t be going through how to configure a custom domain in this tutorial.)
After following these steps, you should see the message “Your site is published at
Modifying the website
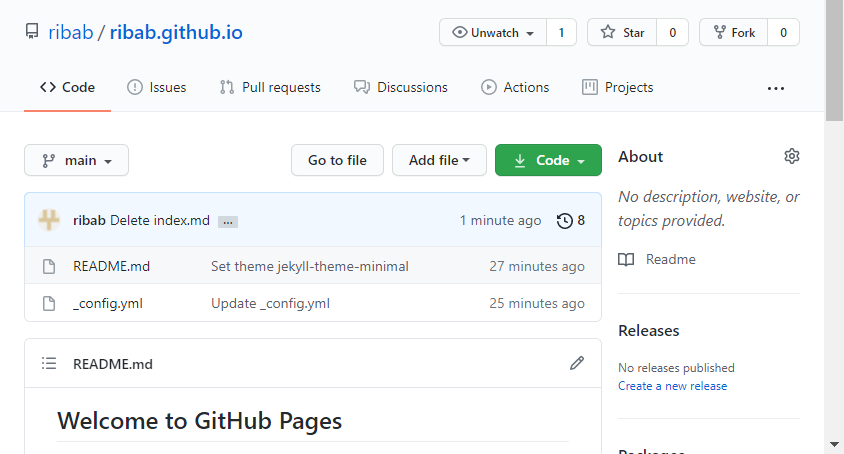
Your repository should look like this now, with just a README.md file and a README.md file and a _config.yml file:
Modifying website content
Since an index.md file doesn’t exist, Github Pages uses README.md as the default entry-point for the website. This is where you can modify the contents of your website.
Click on the file README.md and then click the icon to edit the file.
This file is in Markdown format. Here is a quick guide to markdown.
You can click “ Preview” to see how your markdown will render before you submit. Once you are ready to see your changes live on your website, scroll to the bottom of the page and click “Commit changes” with the bubble checked “ Commit directly to the main branch.”
One cool thing about Markdown - you can write HTML directly within the markdown file. This is how I’m able to render the Github icons in this tutorial
. I copied the HTML for the icons from inspecting github.com with my browser, and pasted it directly into the Markdown file that is rendering this tutorial. This feature of Markdown makes it super flexible at building very custom webpages.
Choosing a different theme
Click on _config.yml. In this file you will see something like:
1 | theme: jekyll-theme-... |
For this tutorial I am using the “minimal” theme, so this is what my _config.yml looks like:
1 | theme: jekyll-theme-minimal |
You can change the theme here by modifying the line after theme: to reflect the name of the new theme, and then clicking “Commit changes” at the bottom of the page.
Customizing the theme
You can add other configuration to _config.yml depending on what your theme supports. The “minimal” theme behaves different for a repo with the name <username>.github.io than it does for a regular repo, where in this case it doesn’t show links to download the TAR or ZIP file and instead just links to the Github profile.
The README.md for the “Minimal” theme which you can read at the bottom of this page shows all instructions for how to customize this theme.
This is what my _config.yml looks like:
1 | theme: jekyll-theme-minimal |
For the logo: part of _config.yml I added a link to my profile picture from Linkedin. To get the URL for this picture I right-clicked on the picture in my Linkedin and clicked “open in new tab”, and then the picture’s URL is shown in the new tab.
In addition, this theme supports google_analytics: ..., which you can use to help Google index your site faster for others to find your website from a Google search. To set this up, you need to set up a google analytics tracking id on analytics.google.com and insert this into your _config.yml.
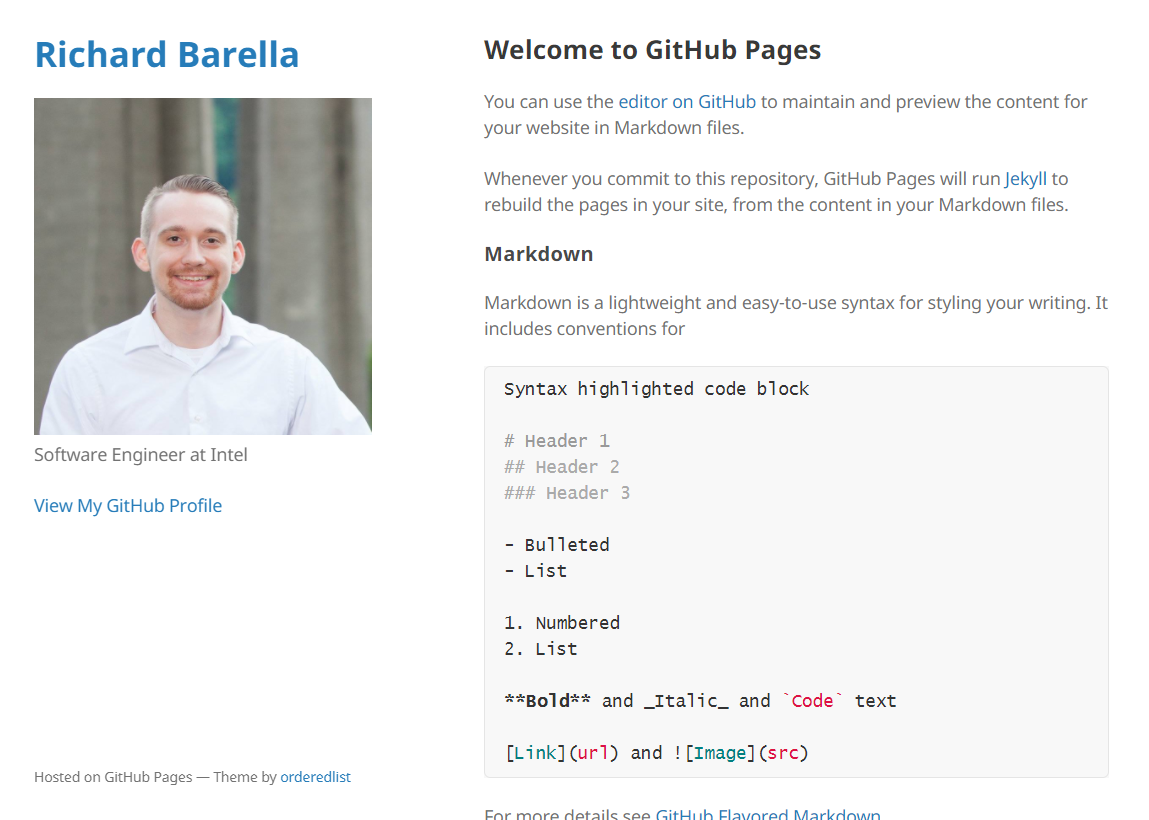
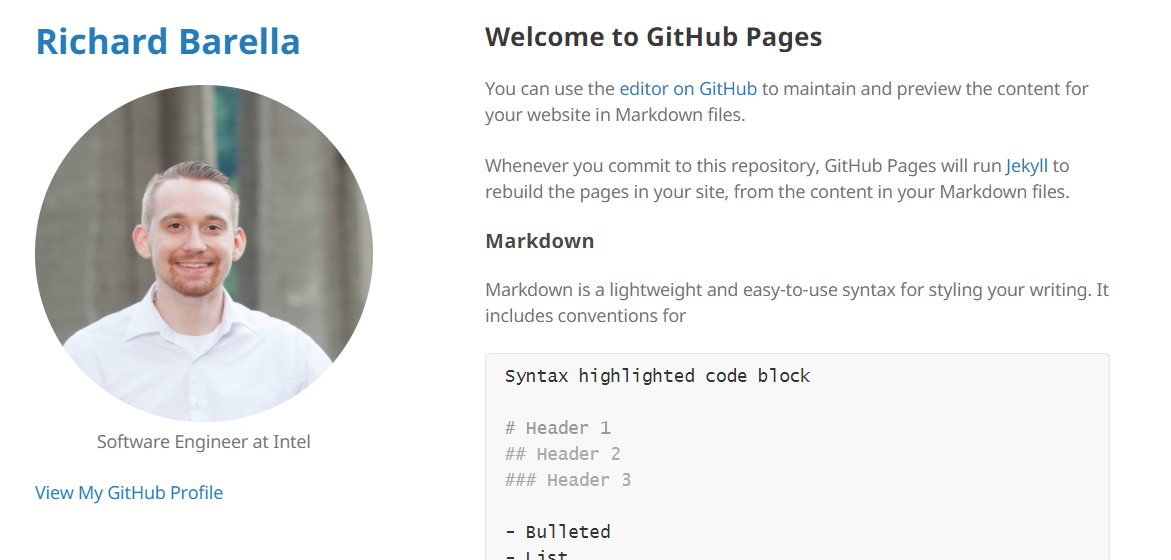
After committing my changes to _config.yml, my website now looks like this:
As you can see it’s a good start, however there is some small things I would like to change. For example, I want my picture to be a circle, and I would like more links under “View My Github Profile” that link to my Linkedin and also my blog. These things can be changed by using the template provided by the theme and also creating my own style.scss file.
Customizing the theme’s style
For the theme’s style, my goal is simply to make my picture rounded rather than square. To do this, add a file to the repo called /assets/css/style.scss. The theme will automatically use this file to style your website.
When creating a new file, you can create it within the /assets/css/ folders by adding assets/css/ to the beginning of your filename.
Within this file, add this to the top:
1 | --- |
After inspecting the HTML of my website at ribab.github.io, I noticed that the <img> for my profile image is located within the <header> element in the HTML. This means I can apply SCSS to only images within the <header> element through something like this: header { img { ... } }.
This is what my final scss file looks like:
1 | --- |
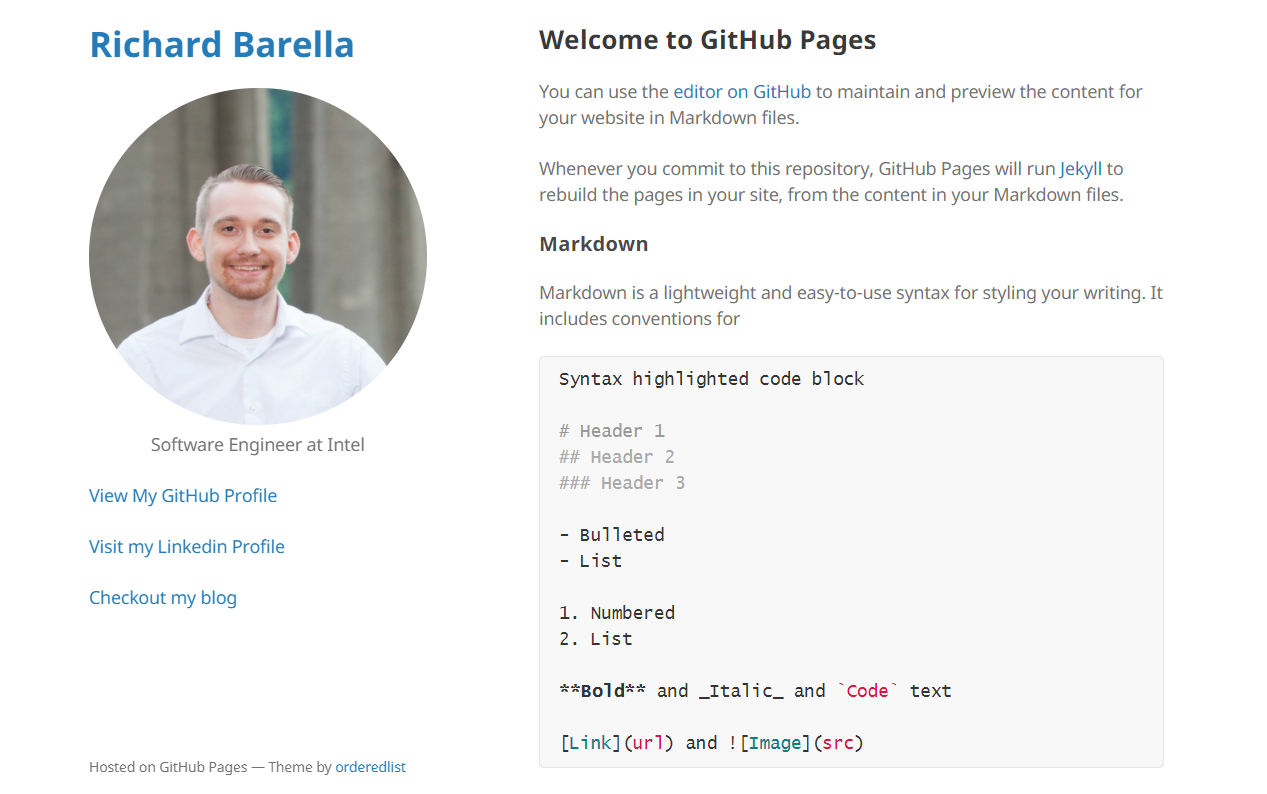
And voilà! I now have a circular icon for my profile picture, and also a centered description with the links staying left-aligned.
Customizing the theme’s template
To add more links to the left column on my webpage, I will need to customize the template for this theme.
- The first step is to navigate to the minimal theme’s
_layouts/default.htmlfile. - Then create a new file
_layouts/default.htmlin your repo and paste the contents of the theme’s layout file into the new file. - Before the end of the
<header>section (or before</header>), add links as you would like with the format:<p class="view"><a href="insert link URL here">Insert link text here</a></p>
This is what I added before </header>:
1 | ... |
Now we’re talking! My website (at ribab.github.io) now looks almost perfect. If I wanted to I could remove the Hosted on Github Pages – Theme by orderedlist text at the bottom by modifying the theme’s layout more, but this is good enough for me.
Conclusion
So this is how to use default theme’s in Github Pages to make your own websites completely for free. I plan to continue working on my own portfolio website and modify the README.md file to showcase all my work and experience. Now it’s time to get creative and make your very own website.
Happy coding!
Recommended Posts
Comments
<code><pre>insert.code.here()<pre/><code/>
